Heading off to a new area to hunt can be challenging and the amount of work to learn a new piece of property can be a daunting task, particularly when it’s public land and other hunters are a factor. Here’s a system for figuring it out in a hurry.
By Bernie Barringer
I first discovered this particular spot on Google Earth a couple years previously. I had been sitting at my computer in Minnesota, several hundred miles away from where I was now in a treestand. The spot interested me because it was a classic funnel with a river on one side and a large area of tall grass CRP on the other. Two woodlots necked down along the river at this point and in my mind I could visualize a big Kansas buck running the banks of the river while cruising for does on a cold November day.
Kansas is too far away to allow a scouting trip, so I had to do my homework long distance. I phoned a game warden, a county conservation biologist and even made an inquiry on a bowhunting forum. All of these conversations gave me some nuggets of information. I decided I was going to spend my Kansas tag on that large tract of public hunting land. Before I left home, I had a half dozen good looking areas to check out, headlined by the funnel along the river.
In the area along the river, I got several photos of shooter bucks, headlined by a ten-pointer with a kicker point and a big eight with chocolate antlers. My stand was hung and the wind was right when I made the long walk to the stand early on the afternoon of November 6.
When a big buck appeared at 28 yards, everything went into automatic. It was a heavy, mature buck; I grunted him to a stop and shot immediately. The shot was perfect and he ran 80 yards before piling up. Sure enough it was the big 8-pointer. He was a mature specimen with beautiful heavy, dark antlers. A buck anyone would be proud to take on public land a long way from home.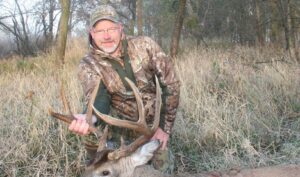
Even the longest deer hunting road trip has to start with the first step. The first step on the road to success, of course, is choosing the right place to go. Once you decide which state you are going to hunt, from there your next step is to choose a piece of public hunting land and evaluate it. Most of that can be done from your home, but the final pieces of the puzzle need to be done with your boots in the dirt. Allow me to walk you through the process.
1) Technology topics
Never before has it been so easy to choose and eliminate properties from the comfort of your home. Aerial photos are stunning in their ability to reveal things that would take hours to learn by scouting. Terrain features jump right off the page at you. Once you learn to read cover and have a basic understanding of how deer use terrain, the things you can learn from Google Earth are priceless.
Focus your attention on edges primarily. Anywhere you see a piece of timber that necks down and then opens back up, you have a funnel. Look for long-running features such as rivers, bluffs and open fields that will funnel deer travel. These spots are all potential hotspots during the rut. Look for potential feeding areas. Are there nearby crop fields? Oak ridges? Where might the deer be bedding? These are all questions to ask yourself. At first, the photos might just look like trees and fields and streams, but as you learn how deer use these features, you soon learn to predict areas with high potential.
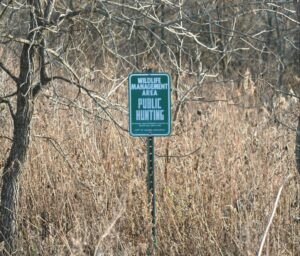
Pay special attention to what surrounds the area. It’s no secret that public hunting areas get quite a bit of hunting pressure. I wish I had a dollar for every time I read that you need to get more than a half-mile from the road to get away from the pressure. While this is good advice in general, there is the common misconception that getting back off the road means just to penetrate the largest block of timber you can find. That’s rarely going to be the best option unless there are food plots planted back in that timber.
One of the best overlooked places I have found to hunt is where the public land meets a crop field. The father it is from a public access point the better I like it. Penetrate the large timber if you want, but if I am going to carry all my gear a mile or more, I want to carry it to a place where the movement patterns are more predictable than they would be in a large unbroken forest. If the does are feeding in these crop fields, the bucks will know it and they will be checking it out during the rut.
 Another often overlooked way to gather information about an area is to ask about it on an internet forum. A simple question on a state-based hunting site or a national hunting forum can yield surprisingly detailed information. The worst that can happen is you get nothing; but normally, you will at least a basic response with some information you can use. At that point a private message to the person might get them to open up more. I once met a guy on a forum that offered to drive me around and show me some spots when I arrived. You bet I took him up on that.
2) Pick up the phone
Calling up a local biologist is always a good idea. County conservation board directors, game wardens and even local sporting goods stores can yield good information. I suggest having a list of questions written out ahead of time so you can get good details. You will want to ask basic questions about the deer population and hunting pressure, but also specific questions about what may be planted in the food plots this year, where they seeing deer while they are out on the property and ask for details on the trophy potential. Lately, I have been asking about EHD and other possible factors that could impact the health of the deer.
Be sure to ask questions about the regulations for the property. Can you use an ATV? Can you leave your stands out overnight or do you have to bring them out with you? Many states require you to have your name and address on all stands and climbing sticks. This type of question can save you from a legal issue later on.
Don’t be afraid to call back a week before you leave to double check and get even more up to the minute information. This is the time when you may get a gold nugget of information. They may tell you where they have seen a lot of deer feeding out in the corn stubble. They may indicate where there has been chasing activity, which will also give you some clues as to the state of rutting activity. They may even tell you of other nonresident hunters and where they are hunting.
3) Take a little trip
If you can do one pre-season scouting trip it can really up your odds of success. There are two times when I feel that scouting trips are most beneficial. One is in the spring and the other is a month or so before you hunt.
In the spring, the rubs and scrapes from the previous fall will still be visible. You can really walk the area out and find out where the bedding areas are found. I hate busting into bedding areas when I am on a hunt, but I hunt aggressively so sometimes that’s necessary. By doing this in the spring, you can walk anywhere without having a negative impact on the fall hunt. You may find a shed or two that will indicate which deer made it through the winter.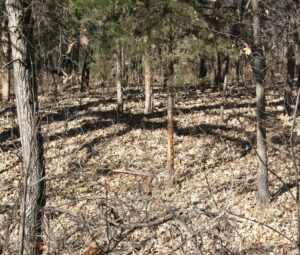
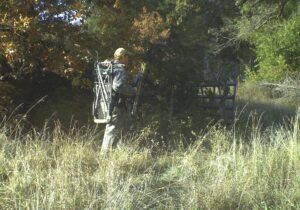
I have often taken a quick trip to hang cameras a few weeks prior to the hunt. I have cleared shooting lanes and even put up stands on a couple occasions. Putting treestands up on public land can be risky (even illegal in some areas) but there are times when the risk is worth it.
Trail cameras put out well before the season can be gathering information while they await your return. Some of the photos I have obtained through this have been very beneficial. In one case it helped me eliminate an entire public hunting area in which I would have wasted a few days, and in other cases it has helped me home in on movement patterns quickly. In all cases, it has helped me estimate the trophy potential and assess the amount of hunting pressure. In a couple places I hunt, I have buddies that will put the cameras out for me. Well before the season I send them 3-4 cameras with fresh batteries installed and they put them out for me.
4) Evaluate potential with cameras
Once I arrive to hunt, the cameras become one of the cornerstones of my hunting strategy. A few cameras placed on primary scrapes with a good lure such as Active Scrape or Special Golden Estrus will take inventory of most of the bucks in the area with a couple days.
The cameras will also give very important clues to the state of the rut. Are the bucks still using the trails between the bedding areas and the feed? Are they actively pawing at the scrapes and working the branches? Are their tarsal glands turning black indicating that they are engaged in rutting activity? Are you seeing the does with the fur on their hips scuffed up from breeding? These and more are the subtle signs that the cameras will give you to help in your site selection process.
If you have done your work well and evaluated the property starting from a wide approach on your home computer and narrowing it down through phone calls, camera surveillance and scouting, you should be able to narrow it down and put your stand in the right spot. The exact spot where you will kill your first–or your next–road trip buck.